How to Set Up Birthday Collection on Account and Onboarding Screens
Collect your customers' birthdays in your mobile app so you can run birthday promotions and campaigns, or verify age for restricted products. Birthdays are saved to a Shopify customer metafield and can be collected on the account screen, during onboarding, or both.
1. Enable the Birthday field in App Settings
- In the Reactiv dashboard, go to App Studio → App Settings
- Scroll to the Birthday & age section
- Turn on Collect birthdays
This is the main switch that enables birthday collection in the app.
2. Create and configure the Shopify customer metafield
- In Shopify, create a customer metafield to store birthday data
- Set the metafield type to Date
- Set Customer Account API access to Read and write
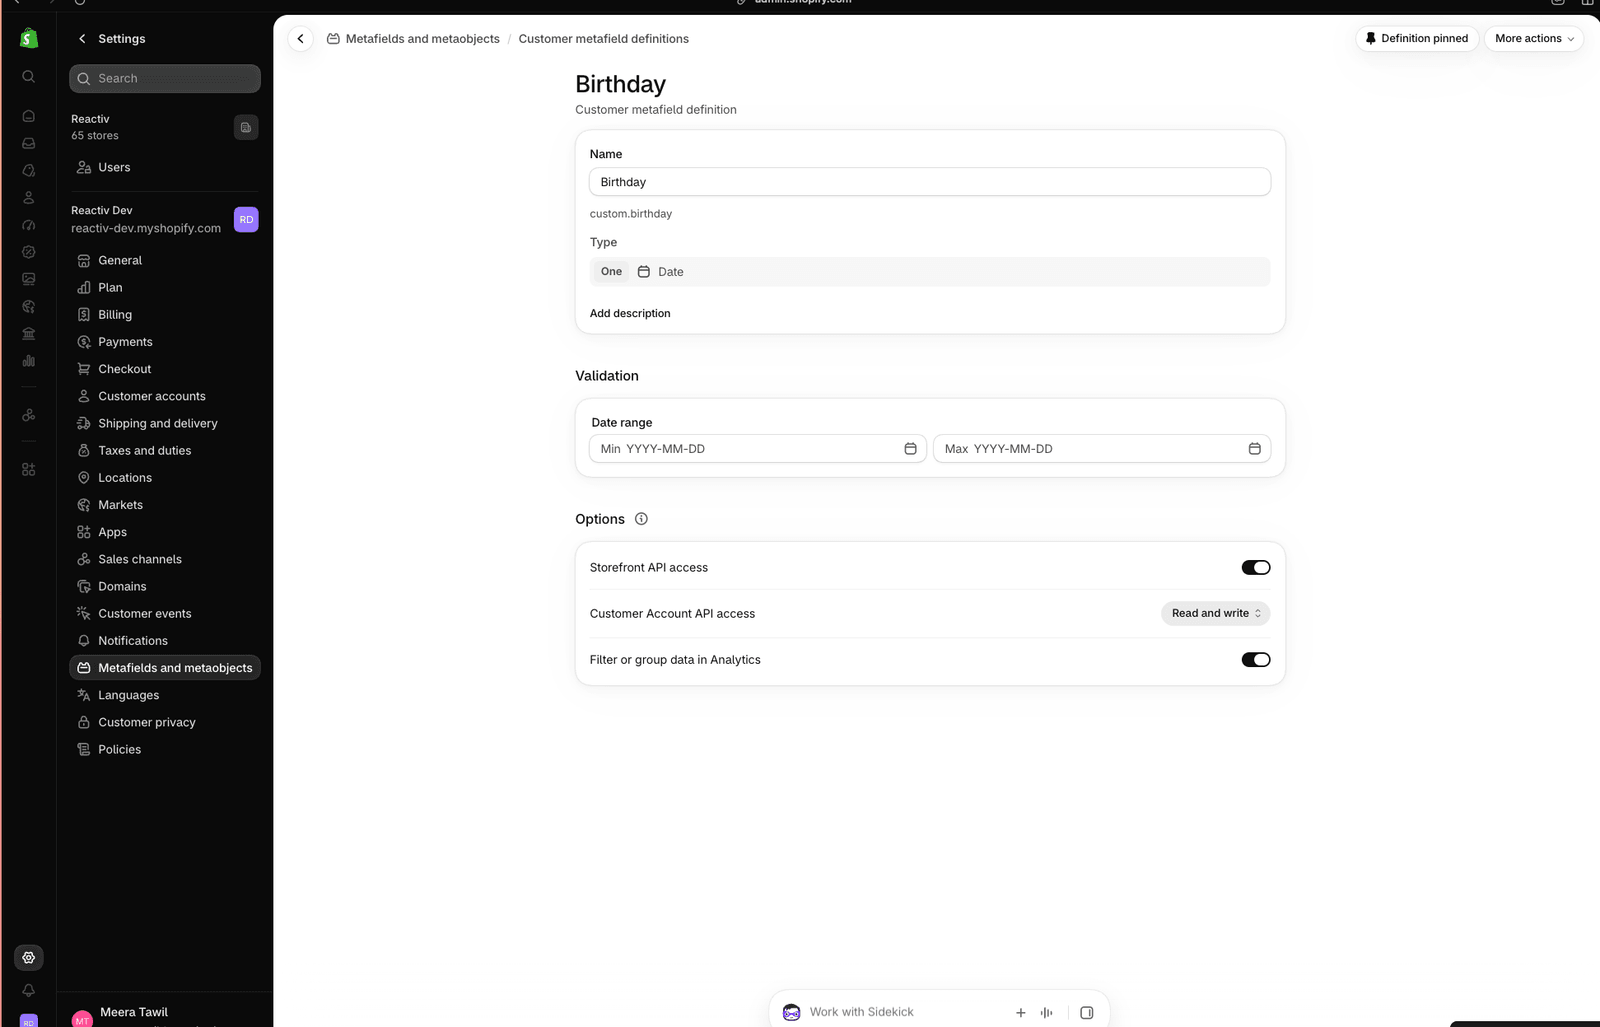
The metafield type must be Date. Other types can't be used for birthday collection.
Read and write access lets the app:
- Read existing birthday data
- Display it in the mobile app
- Save birthday submissions from shoppers
3. Select the birthday metafield
- Return to the birthday settings in App Settings
- Open the Birthday metafield dropdown
- Select the birthday metafield you want to use
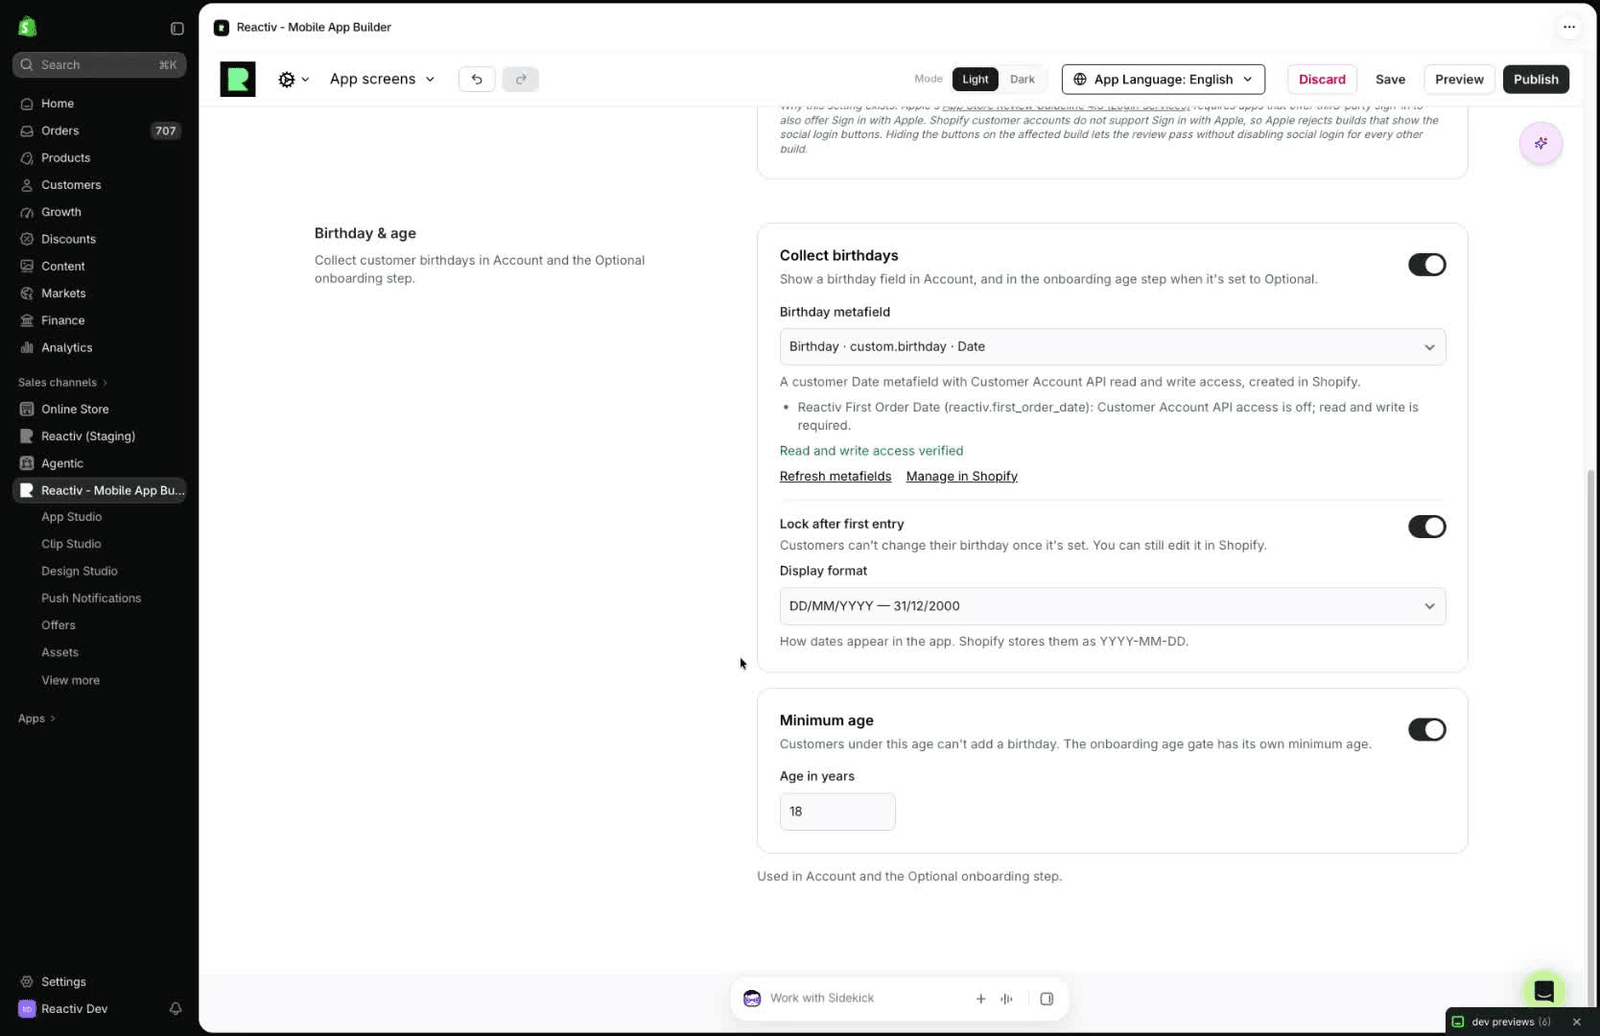
Once the metafield is configured correctly, it appears in the dropdown and you see Read and write access verified. If you just created the metafield, click Refresh metafields.
If a metafield appears grayed out, check that its type is Date and that Customer Account API access is set to Read and write.
4. Decide whether customers can edit their birthday
- Choose whether to turn on Lock after first entry
- Turn this on to prevent customers from changing their birthday later
Locking the field helps reduce abuse of birthday-based promotions or campaigns. You can still edit a locked birthday in Shopify.
5. Choose the date format and minimum age
- Under Display format, select how the birthday should appear in the mobile app, for example
DD/MM/YYYY - If needed, turn on Minimum age
- Under Age in years, set the minimum age, for example
18, to stop younger users from entering an invalid birth year
The value is always stored in Shopify's required date format (YYYY-MM-DD). The format you choose only changes how it's displayed in the app.
6. Save and publish the account screen configuration
- Click Save, then Publish
The birthday field now appears in the Personal Information section of the account screen in your mobile app.
7. Enable birthday collection on the onboarding screen (optional)
- Go to App Studio → Customer Onboarding
- In the screen selector, choose Age Verification
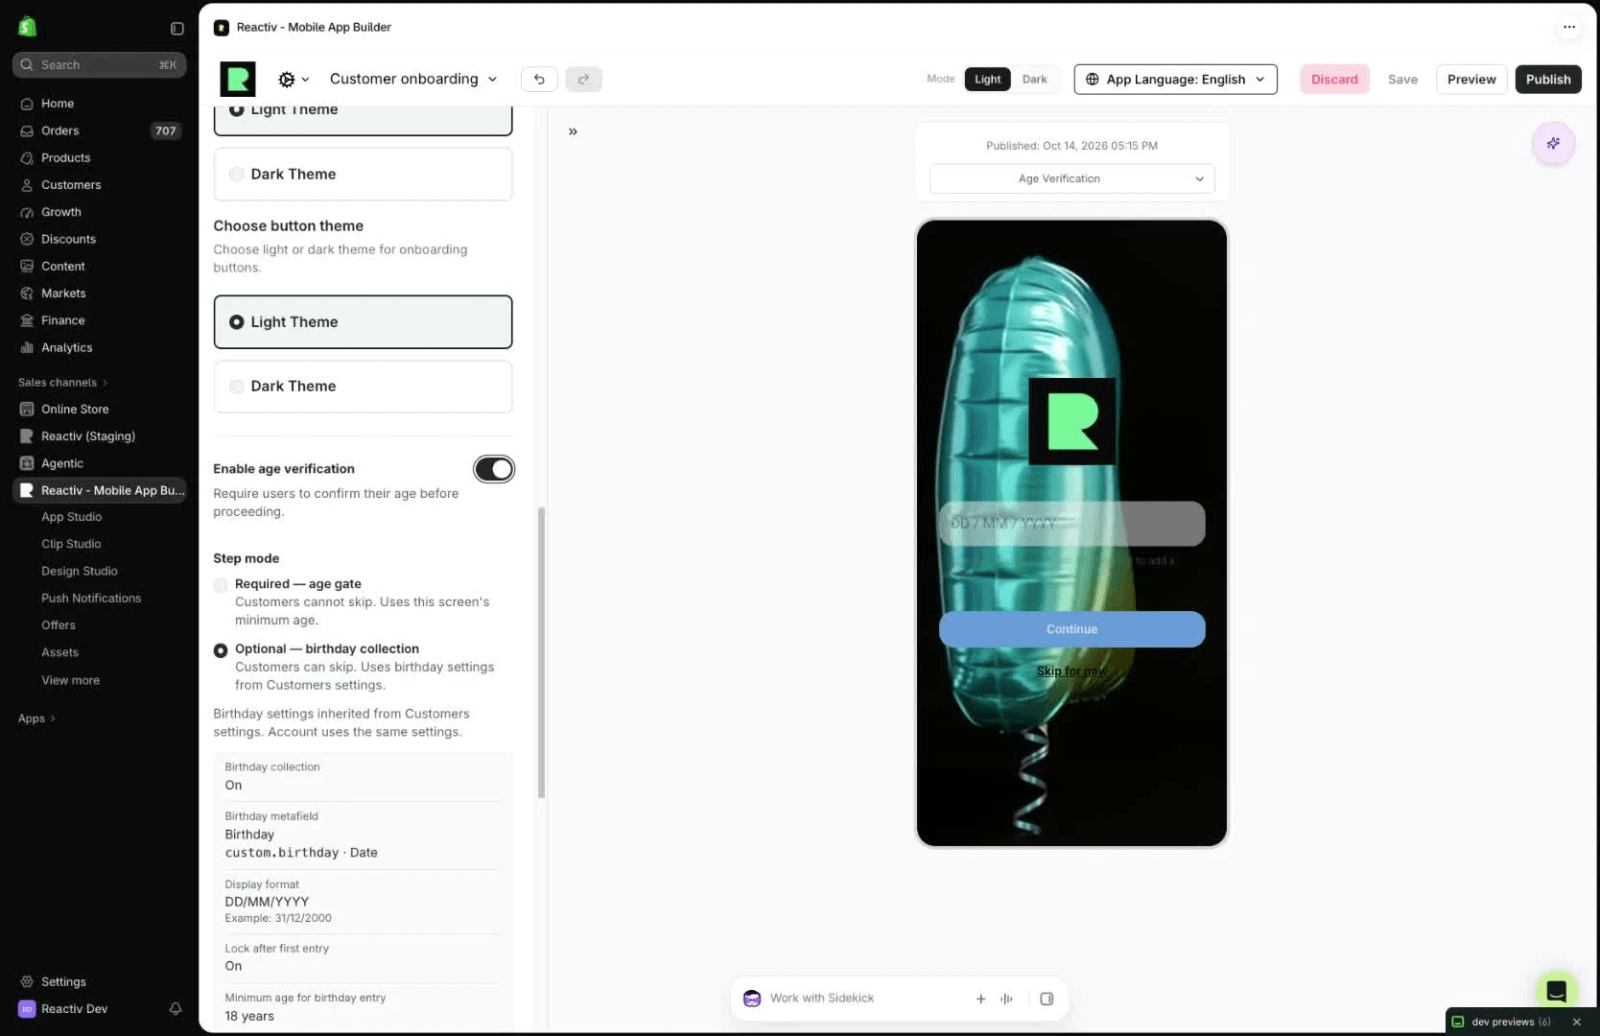
- Turn on Enable age verification
This adds a birthday step to the onboarding flow.
8. Choose optional or required age verification
Under Step mode, select the mode that fits your store:
| Mode | What it does | Best for |
|---|---|---|
| Optional — birthday collection | Lets users skip the step. Uses the birthday settings from App Settings. | Most merchants |
| Required — age gate | Users can't skip the step. Blocks access if the user is under this screen's minimum age. | Legally restricted products, like alcohol or cannabis |
9. Confirm your settings and publish the onboarding flow
- Review the confirmation details:
- Which metafield stores the data
- Whether the customer can edit their birthday
- The minimum age rule
- Click Save, then Publish
Birthday collection is now enabled on both the account screen and the onboarding screen.