Integrations
Setting up OneSignal Push Notifications
Before you begin
Make sure you have:
- A OneSignal App already created for your store and access to its dashboard.
- Reactiv Sales Channel installed in your Shopify store.
- Access to both Shopify Admin and OneSignal with the correct credentials.
1. Copy your OneSignal credentials
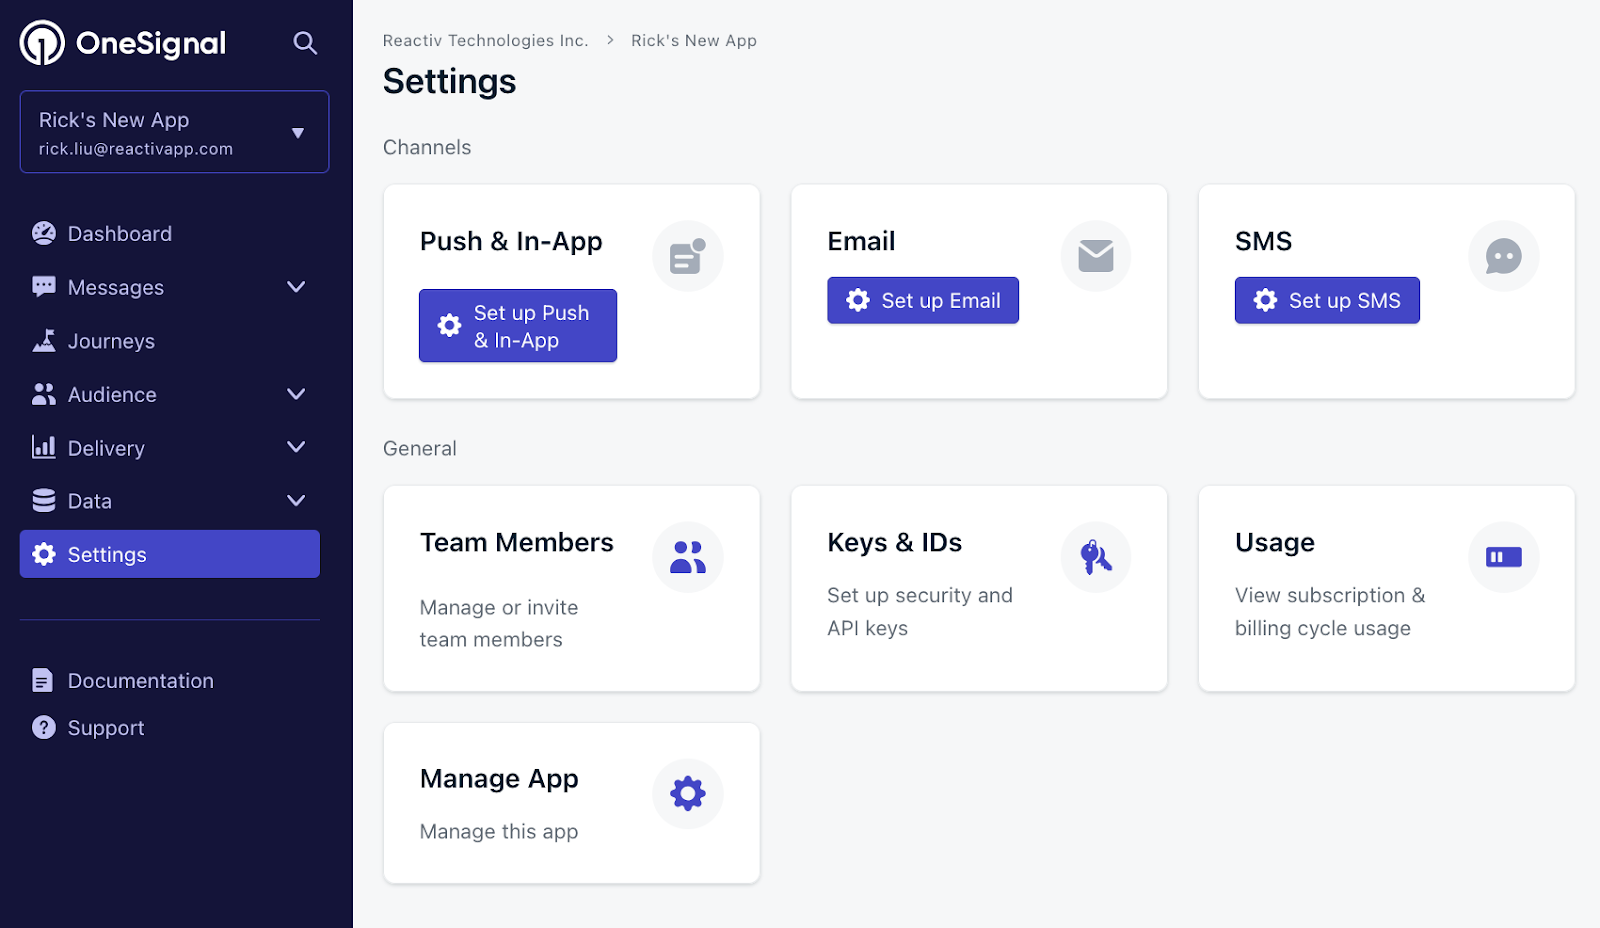
- Sign in to your OneSignal dashboard and select the app you created for your store.
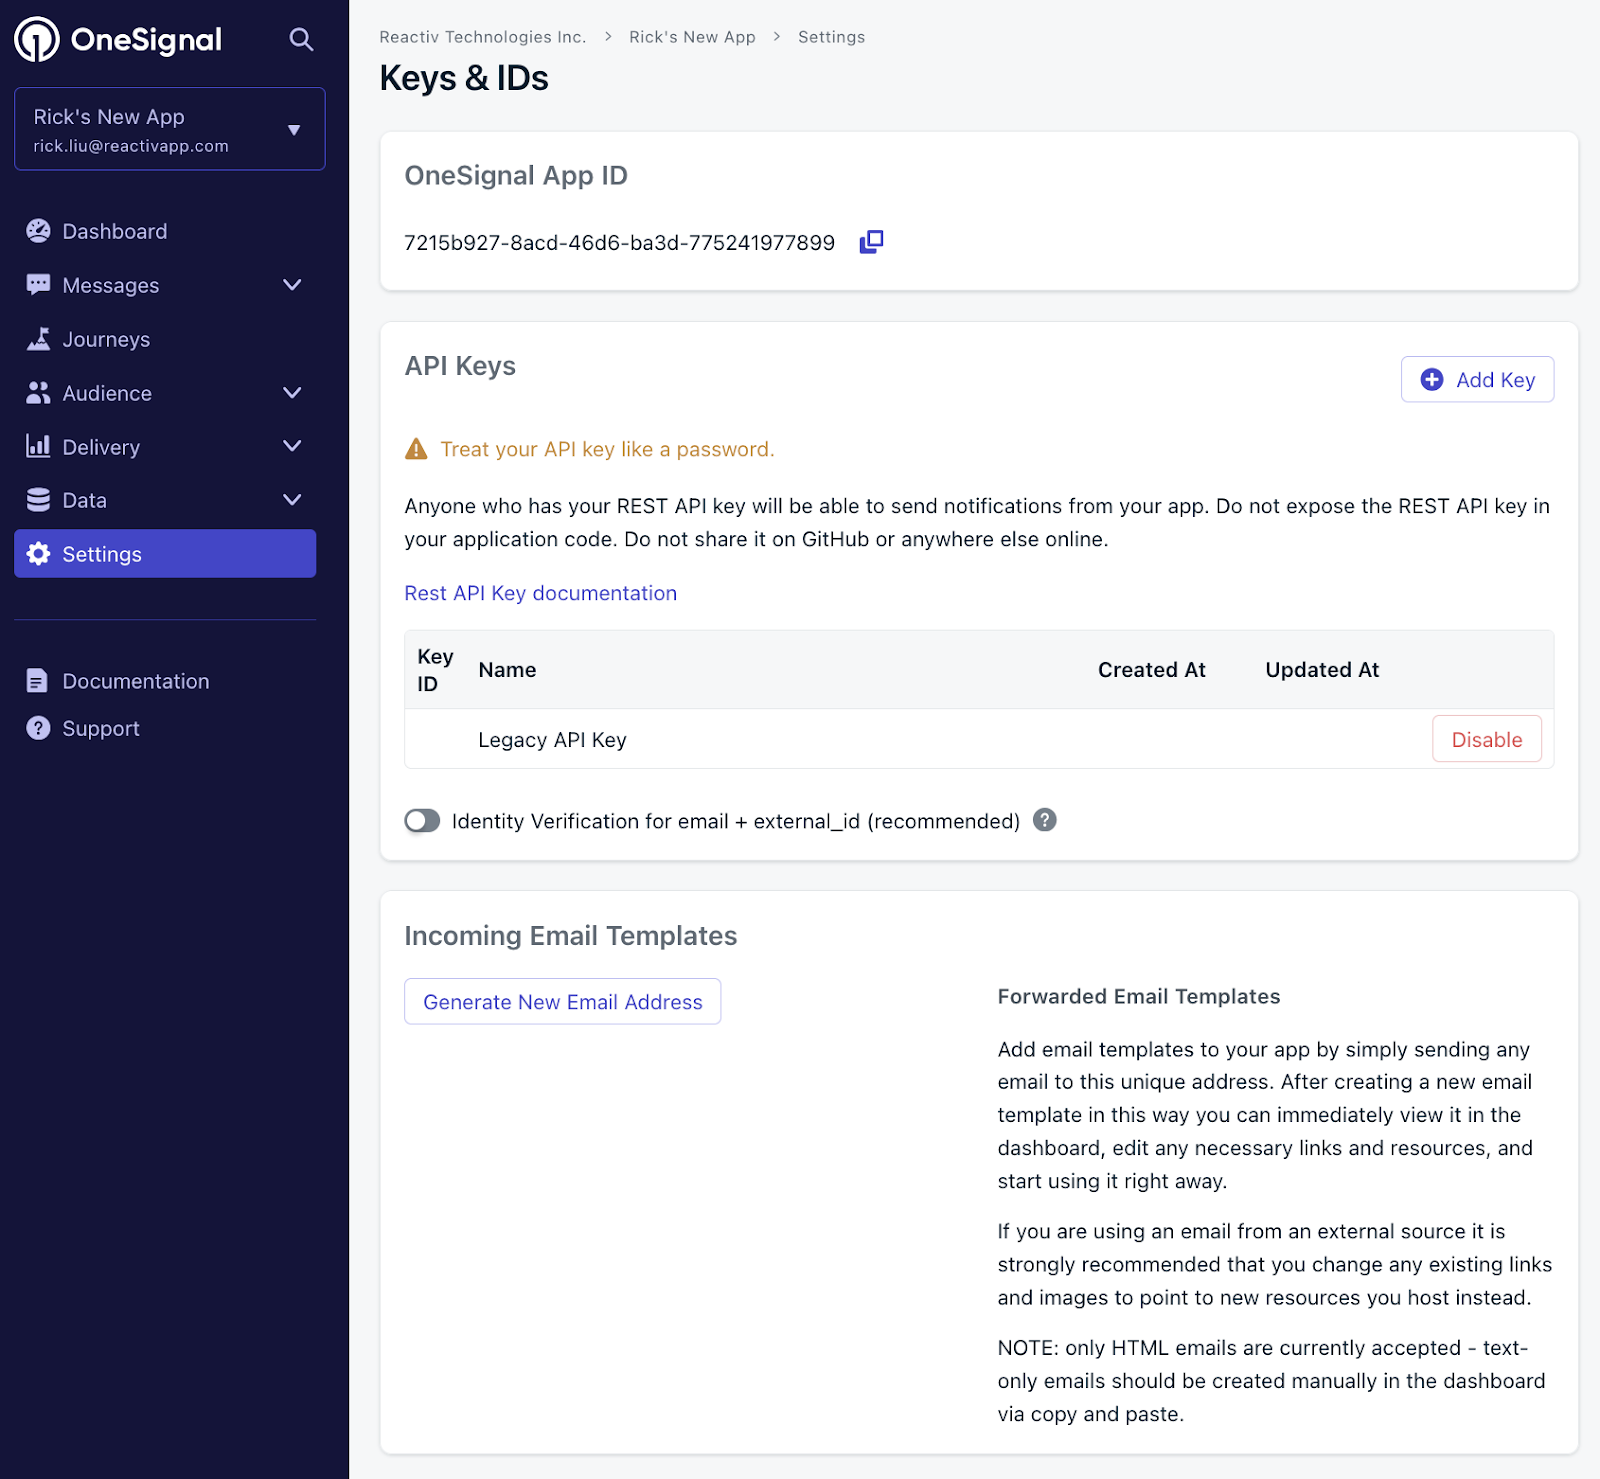
- In the left sidebar, click Settings → Keys & IDs.
- Copy these two values:
- App ID – shown at the top of the page.
- REST API Key – click Add API Key, name it, then click Create and Copy.
2. Connect OneSignal inside Reactiv
- Log in to your Shopify admin dashboard.
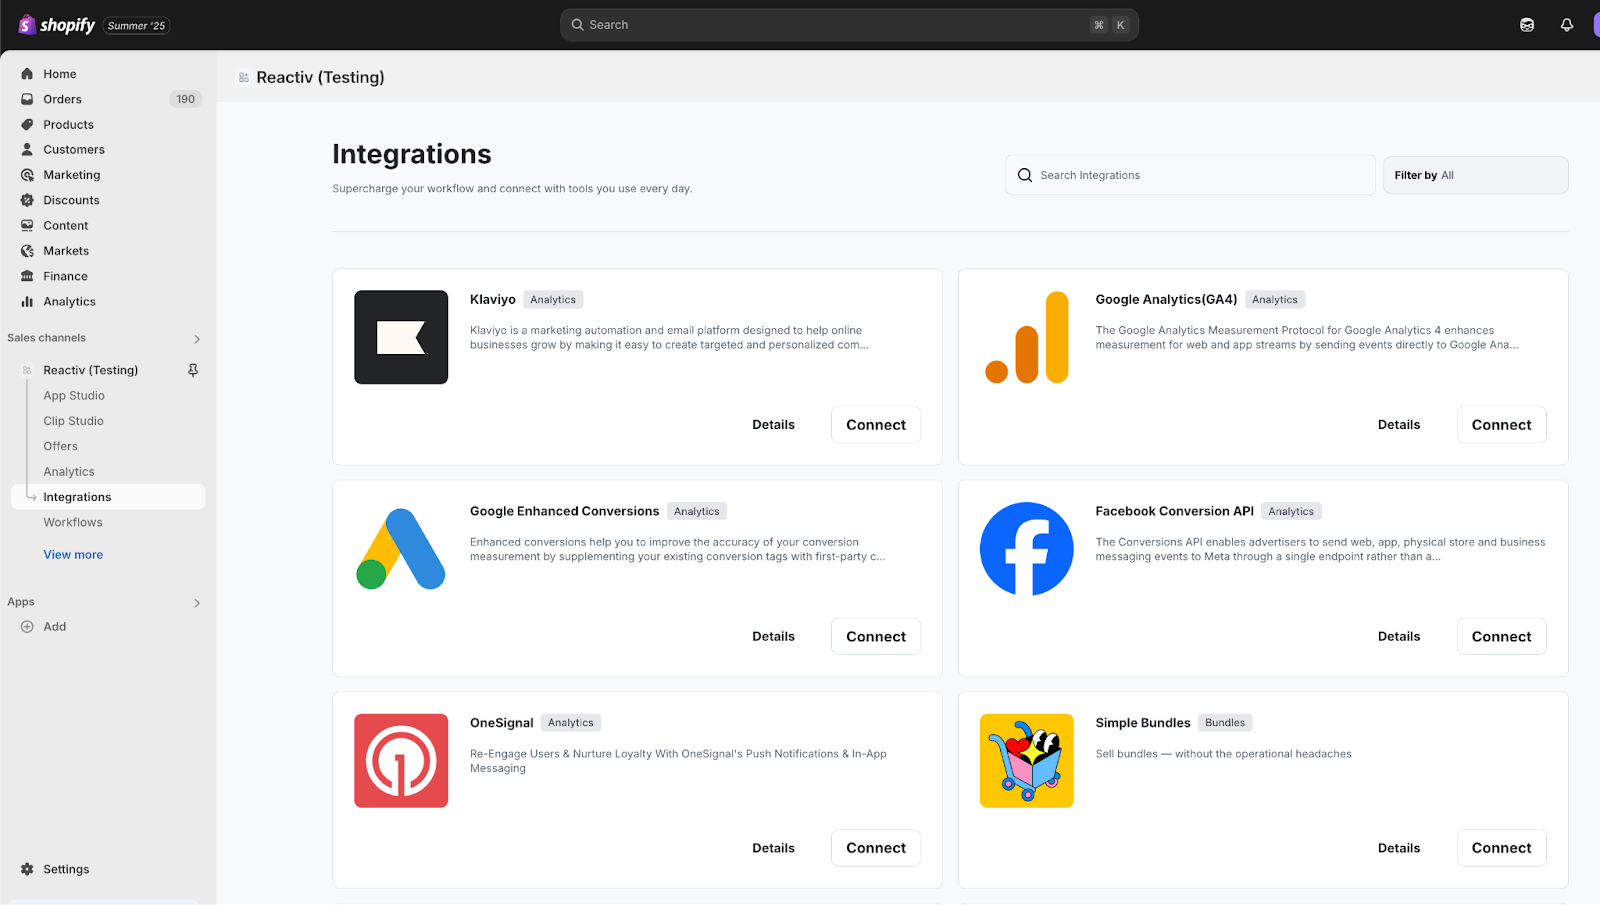
- In the left-hand sidebar, scroll to the Sales Channels section.
- Click Reactiv – Mobile App Builder, then select App Studio.
- From the left navigation panel under App Studio, click Integrations.
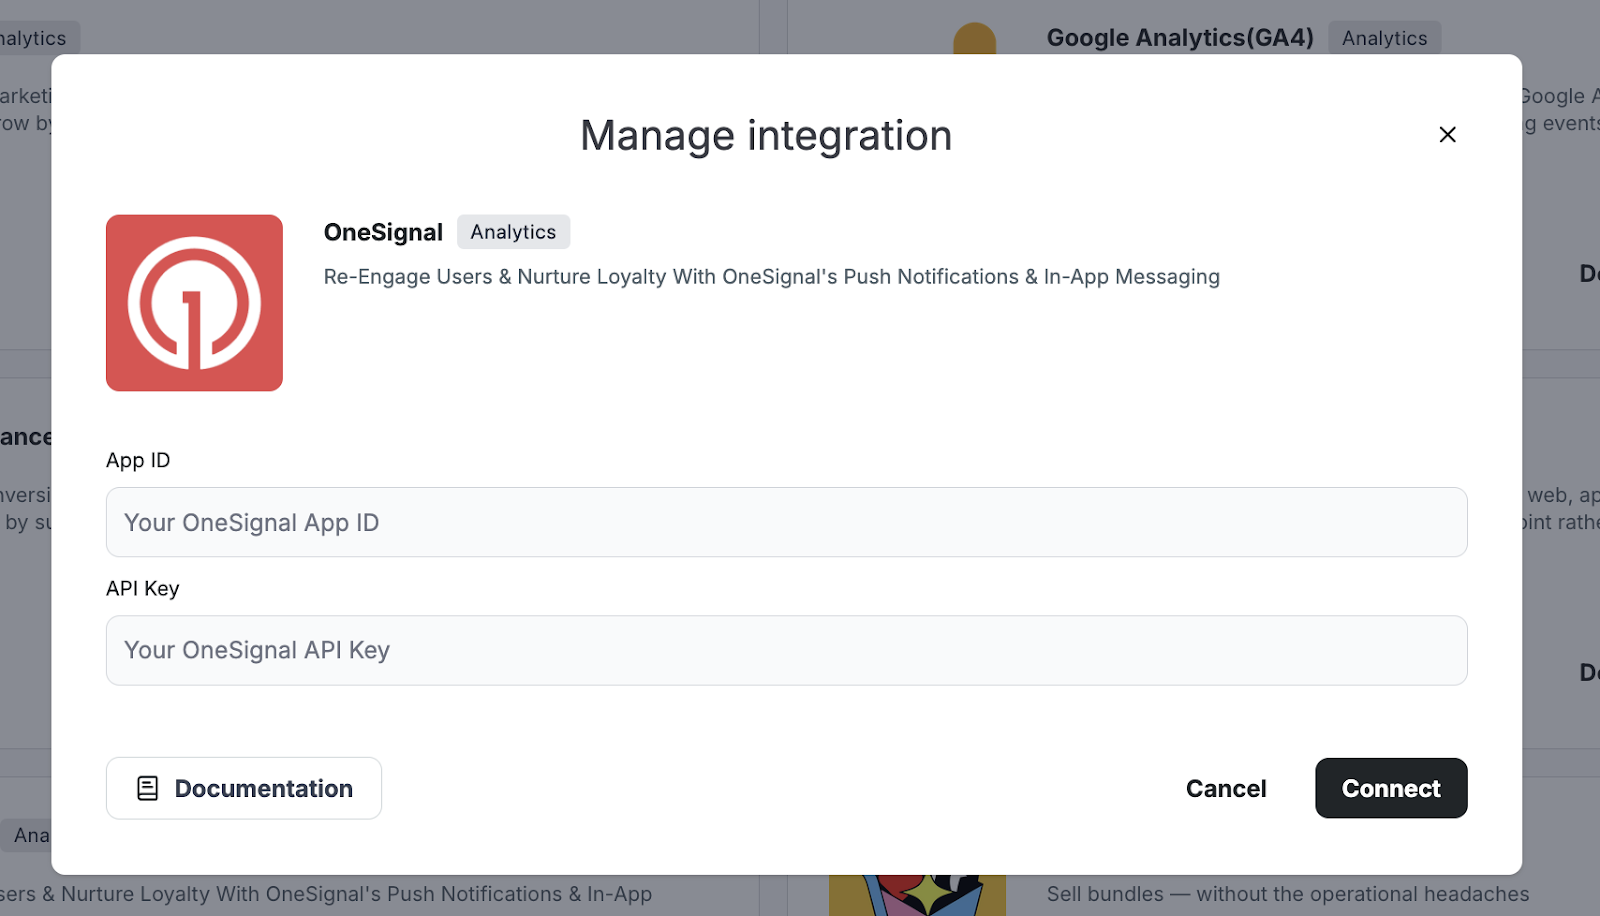
- Scroll through the list of integrations until you find OneSignal, click Connect.
- Paste the App ID and REST API Key you copied from OneSignal, then click Connect.
3. Enable OneSignal in Workflows (optional but recommended)
- In the Reactiv sidebar, click Workflows.
- Click Settings then Integration Settings.
- Paste the OneSignal App ID in the OneSignal field.
- Click Publish to activate the workflow.
You’re all set! Reactiv is now connected to OneSignal. Any push notifications you trigger in Reactiv Workflows will be sent through your OneSignal account.
💡 Need Help?
We’re here for you! Visit www.reactiv.ai or reach out to our support team anytime for tips, troubleshooting, or personalized guidance.
Was this page helpful?