Integrations
Setting up Redo Returns with Reactiv
Prerequisites
Before setting up Redo integration, ensure the following:
- You have an active Redo account with access to the API key.
- You are signed up for a Reactiv Plan.
- Your Reactiv Mobile App is already set up and functioning.
Step 1: Access the Integrations Page
- Log in to your Shopify admin dashboard.
- In the left-hand menu, locate Reactiv - Mobile App Builder under the "Sales channels" section.
- Click on Reactiv - Mobile App Builder to open the Reactiv dashboard.
- Select Integrations from the sidebar.
Step 2: Locate Redo Returns
- On the Integrations page, use the search bar or scroll to find Redo Returns using the search bar.
- Click the Connect button next to Redo Returns to access the integration settings.
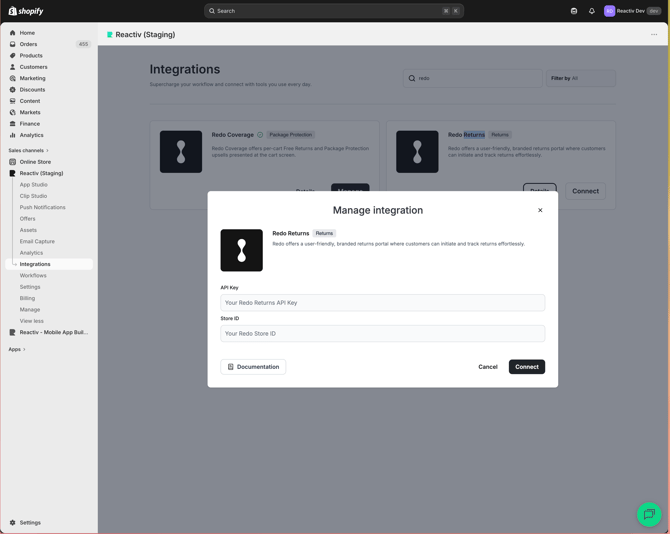
Step 3: Connect Redo Returns to Your Mobile App
- In the Redo Returns integration popup, you will see a field for the App Key.
- Obtain your App Key by following this guide from Redo Returns.
- Paste the App Key into the App Key field in the Reactiv integration popup.
- After entering your App Key, click the Connect/Update button to save the integration.
- Once saved, Redo Returns will be connected to Reactiv.
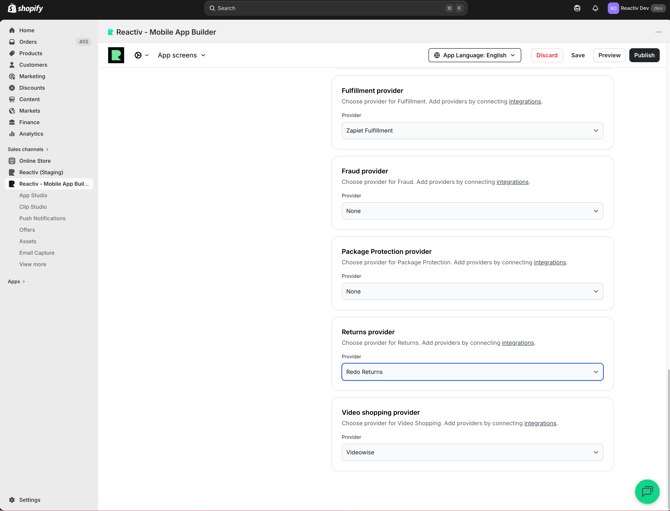
Step 4: Set Redo Returns as the Returns Provider
- On the Reactiv Dashboard, navigate to Settings then click on the Integrations Tab
- Set Redo Returns as the Returns provider and Save
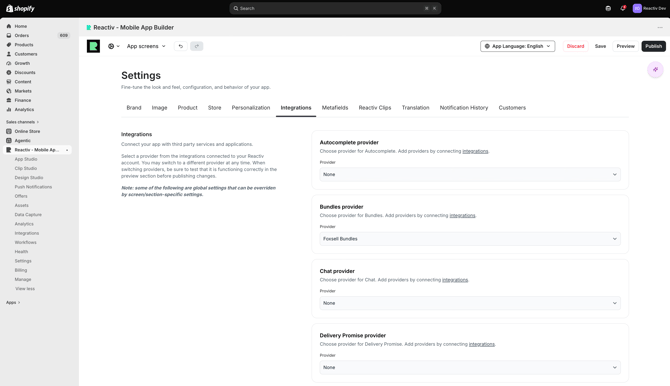

Step 5: Verify the Integration
- Before publishing your app update, thoroughly test the Loop Returns integration in the preview app.
- Ensure that a start a return button appears on all eligible orders in the App Order History Screen.
Troubleshooting
If you encounter issues during the setup, please contact our support team via chat or email.
📝 Always save and publish your work in the dashboard before checking the mobile app.
📝 Always save and publish your work in the dashboard before checking the mobile app.
Was this page helpful?