How to Set Up a Manually Merchandised Carousel Using a Product Metafield
Choose exactly which products appear in a carousel, instead of relying on the default recommendation engine. You store the products in a product metafield, and the Product Recommendations carousel reads that list.
1. Understand what this carousel does
- The carousel is powered by a product metafield of type
ProductList(a list of products). - You choose the products in each list yourself, so you control what shoppers see.
- Common use cases:
- Shop the look or complete the look
- Curated product sets
- Cart upsells
- Any other custom merchandising scenario
New to metafields in Reactiv? See Use Shopify Metafields in Reactiv to make a metafield available to your app.
2. Enable the product metafield in App Settings
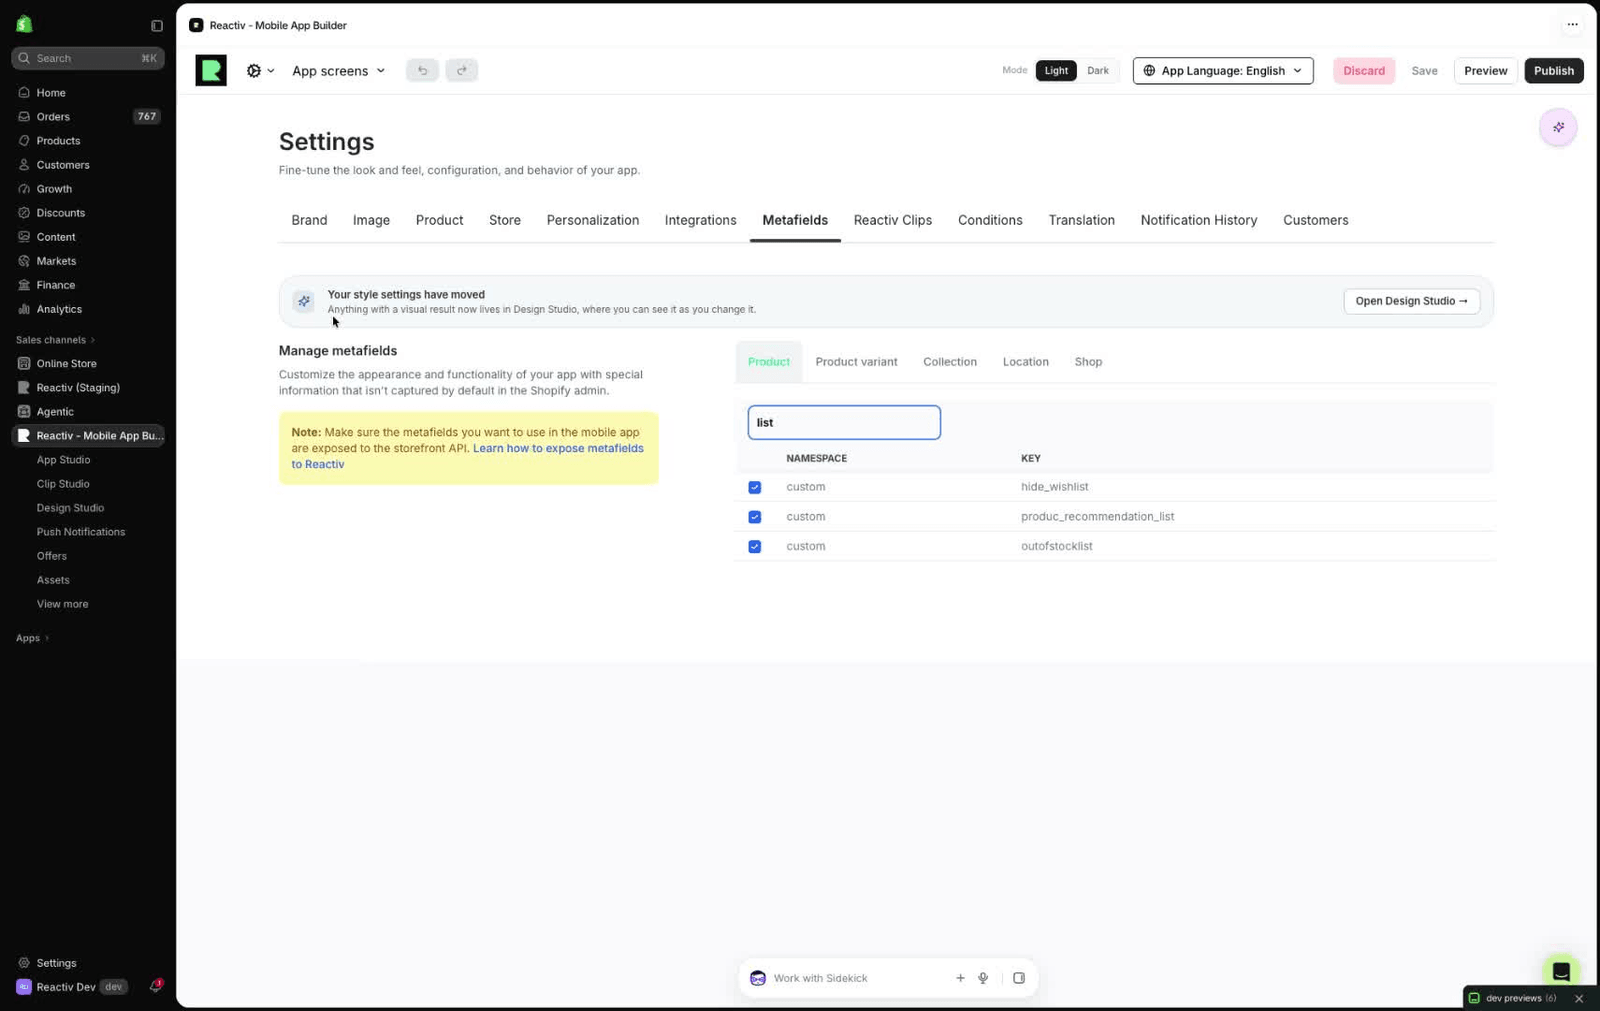
- Go to App Settings.
- Open the Metafields tab, then the Product tab.
- Search for the product metafield that holds the products you want to show. In this example, it is
produc_recommendation_list. - Check the box to enable it.
- Click Save.
3. Add the carousel in App Studio
- Go to App Studio.
- Open the screen where you want the carousel. You can use it on:
- Home
- Shop
- Product Detail Page
- Cart
- Drag and drop the Product Recommendations component onto the page.
This guide uses the Product Detail Page as the example. The cart has an extra setting, covered in Set up the carousel on the cart screen.
4. Set the source and product limit
- Under Source, choose Product metafield instead of a default source such as Shopify recommendations.
- In Maximum products to show, set how many products the carousel shows:
- Enter a cap to limit how many products appear.
- Enter a large number to show every product in the metafield.
5. Point the carousel to the right metafield
- Under Product list metafield, select the metafield that holds the products. In this example, it is
custom.sibling_products. - Products appear in the carousel in the same order as in the metafield.
- The app now reads this metafield to build the carousel.
6. Set display rules and out-of-stock behavior
- In Minimum products, set how many products the metafield must contain for the carousel to appear. For example, enter
2to show the carousel only when the metafield has at least 2 products. - If a product's metafield has fewer products than the minimum, the carousel does not display.
- Under Unavailable products, choose how to handle out-of-stock products:
- Hide them, or
- Show dimmed to show them in a dimmed state.
7. Save and publish
- Click Save.
- Click Publish.
The carousel now appears on the Product Detail Page.
Set up the carousel on the cart screen
A cart can hold several products, and each one can have its own recommendation list. So the cart version of the carousel has an extra setting that decides how those lists combine.
1. Add the carousel to the cart screen
- In App Studio, open the Cart screen.
- Drag and drop the Product Recommendations component onto the page.
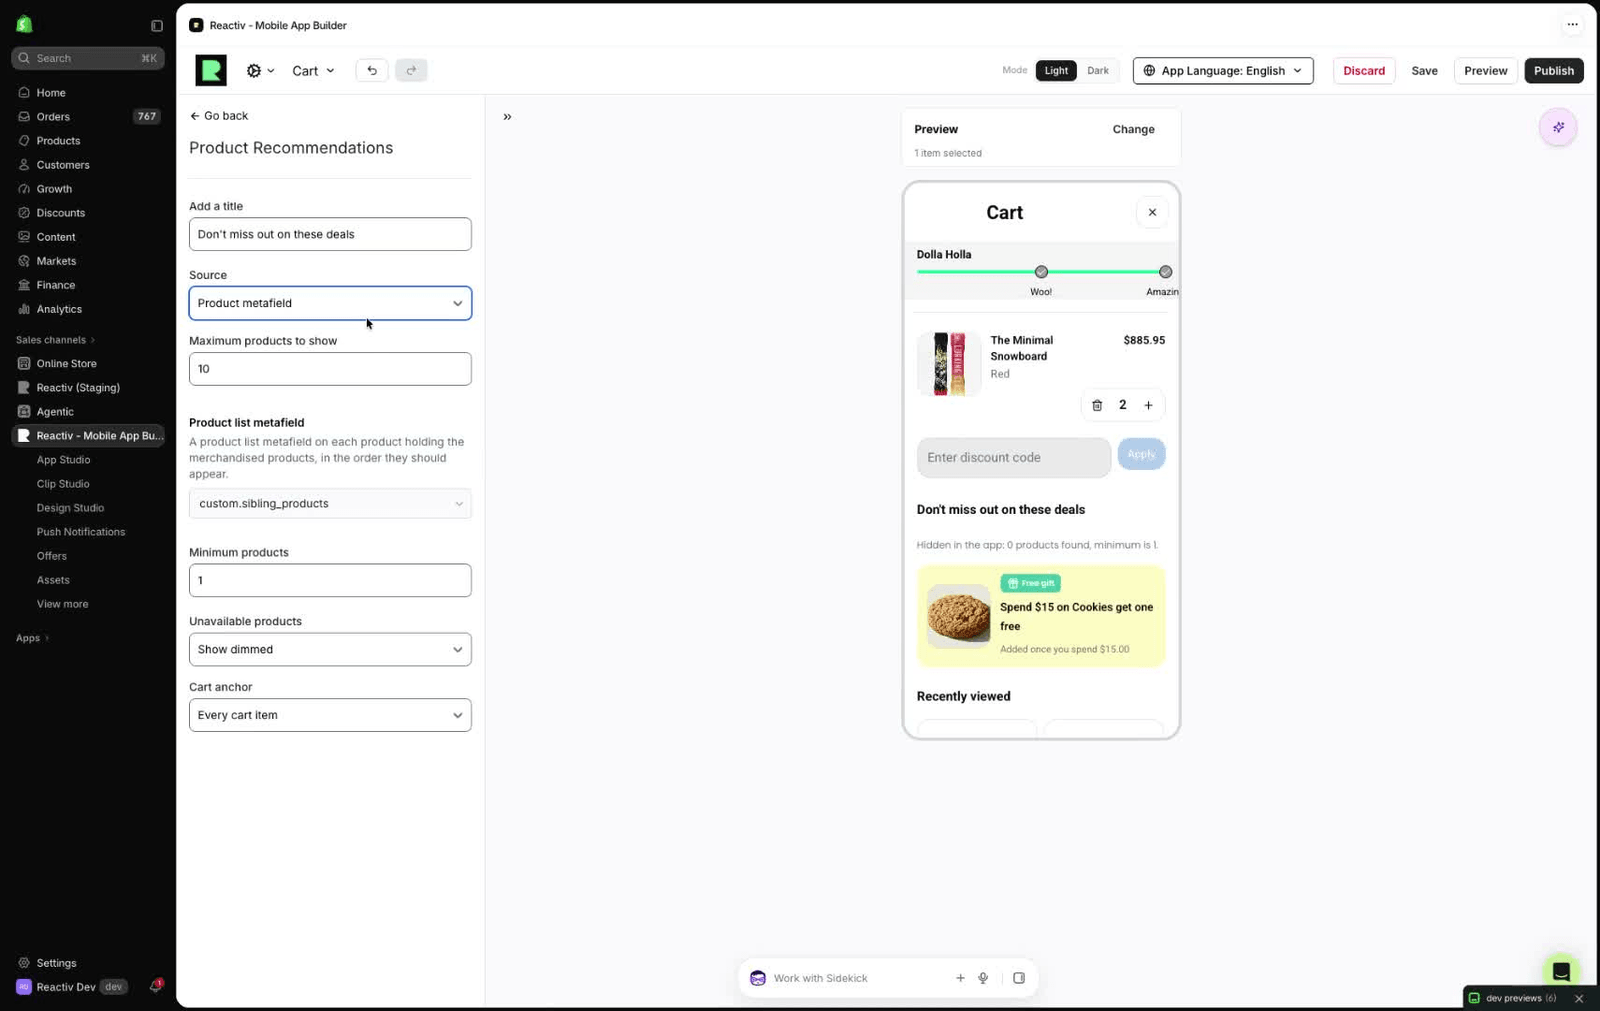
- In Add a title, enter the heading shoppers see above the carousel, for example
Don't miss out on these deals. - Set Source, Maximum products to show, Product list metafield, Minimum products, and Unavailable products as in steps 4 to 6 above.
2. Choose how cart recommendations combine
Under Cart anchor, choose how the lists from each cart item work together:
| Option | What the carousel shows |
|---|---|
| Every cart item | Recommendations from all items in the cart, merged into one list. The list grows as shoppers add more items. |
| Last added item | Only the recommendation list of the item most recently added to the cart. |
3. Save and publish
- Click Save.
- Click Publish.
The cart carousel now uses your metafield lists and the cart anchor you chose.